Thursday, December 16, 2010

Last Week! 13 weeks of Personalized Gift Ideas


Can you believe it? One week left 'til Christmas. Well, we can help you stuff those stockings! These acrylic paperwieghts can be custom engraved with your own quote, mantra or message, or you can pick up one of our ready-made versions for just $7.95.

Wednesday, December 8, 2010

Custom Mugs & Coasters! It's week 12 of our 13 weeks of Personalized Gifts promotion!

Logos, your kids art, photos ... all kinds of things can be imprinted on our custom mugs & coasters! Just send us your jpegs or drop off your hard copies, and we will take care of the rest! (and save 20% to boot!)

Thursday, December 2, 2010

Scrapbooks you can wear! Week 11 - 13 Weeks of Personalized Gift Ideas

Visit our web site for some ideas then visit our store for an even more extensive selection!
You supply the photos & we'll take care of the rest!

Friday, November 26, 2010

Personalized Keepsake Boxes 20% off for Week 10!

Stop in this week to browse our selection (don't forget to bring your photo - jpeg or hard copy) :)

Wednesday, November 17, 2010

Week 9 (already!) - 13 Weeks of Personalized Gift Ideas - Photo Crystals


These are the newest, coolest photo gifts available, and we make them in our store!!! Check out all the shapes & sizes available by clicking here then get your pictures to us so we can take care of the rest!

Wednesday, November 10, 2010

Week 8 - 13 Weeks of Personalized Gift Ideas - Photo Ornaments! (everyone's favorite!)

For a few more examples, visit our web site  then call or come in to order yours today! Not in the area? photos can easily be emailed to orders@imageawards.net  ... just include your contact info & we'll take care of the rest!

Tuesday, September 14, 2010

13 Weeks of Personalized Gift Ideas!

Beginning September 26th, we will provide weekly ideas & special offers to help you score big with your family & friends come Christmastime!

A new deal on one of a kind gifts will be offered each Thursday and will be good for one week. From photo books to engraved glassware to personalized ornaments & more! Be sure to keep checking back ... you won't want to miss out!

To search for ideas of your own, feel free to visit http://www.imageawards.net/ .

Saturday, August 28, 2010

Memories of experiences become prized posessions!

I hate to rush the holidays, but wanted to remind you to start taking your pictures with your holiday gift giving in mind. We make awesome ornaments, coffee mugs, posters, jewelry, tiles, wall art etc. Memories of experiences, rather than "stuff", will become prized posessions. Taking great photos now ensures your ability to put the best most personal and thoughtful photo gifts under that tree of yours!

Here are a few ideas to get your creative juices flowing :)

Photo Crystals http://imageawards.net/images/pdf/PhotoCrystal.pdf

Personalized Ornaments http://imageawards.net/ornaments.html

Jewelry http://imageawards.net/jewelry.html

Tuesday, June 8, 2010

Heidi's Heritage Home

Decorate your home with family photos & memorabelia! It's super easy with Heritage Makers. Watch this video for ideas, then log on at http://www.makeyourmomentslast.com/
Make your home a Heritage Home!

Friday, June 4, 2010

How to Separate Items on One Page in Photoshop or PSE

How to Separate Items on One Page in Photoshop or PSE - from the Designer Digitals newsletter

You can also watch this tip on video on their blog: How to Separate Items on One Page in Photoshop or PSE [Video]

Designers sometimes group alphabets or elements on one page for your convenience. I like pages of grouped elements because it means I only have to open one file, but I have all of the letters or elements available to use on my digital project.

When you download a file with elements that are grouped together in one .png image, here's how to use them:

Open your digital project and the .png image in Photoshop or Elements.

Click on the .png image to select it.

Get the Rectangular Marquee tool and draw a rectangle around the item on the page that you want to use.

Switch to the Move tool.

Make sure that the .png image layer is selected in the Layers Panel. Drag the item you have selected over to your digital project.

Switching to the Move tool is an important step because neglecting to do this moves the selection, not the part of the image you want to move.

Go back to the .png image and select Ctrl D (Mac: Cmd D) on your keyboard to remove the selection. Use the Marquee tool to get another item, if desired.

This also works with other selection tools like the Elliptical Marquee tool and the Lasso tools. To use the Lasso tool, click on the .png image and draw a selection around the part of the image you want to use. The selection will close and you will see marching ants when you reach the spot where you started drawing the selection.

Next, switch to the Move tool and check to make sure the image is highlighted in the Layers Panel. Then drag the item over to your digital project.

If you are not using Photoshop or Elements, you might need to make a copy of the sheet and use your software's Crop tool to crop away the part of the image you are not using. Drag the item to your scrapbook page and then undo your crop.

Tuesday, June 1, 2010

Another great reunion idea by Sherrie Wright

This is an idea we did for our family reuion. My Great Grandparents are no longer alive. Most of my Great Aunts and Uncles were still alive at the time. My great grandpa was a gas station owner in the 30’s and 40’s, so my great anuts and uncles even their kids remember all the stories about the gas station. So for a keep sake we took a very old picture of my grandfather at the station. I touched up the old photo and scanned several copies of it, framed them in shadow boxes. I put a miniture old time gas station pump and minuture oil canand some minutre tools aranges them in the shadow box and presented it to the oringal children of the family. It was a huge success! It brought many tears and laughs to our reuion. That was about 7 years ago and our reioun is still talked about today. It’s all about memories and sharing them.

Sunday, May 30, 2010

Fun Family Reunion Ideas

Submitted by: Heidi Arave


Do you have a family reunion this summer? Here are some great ideas of fun things you can do at your family reunion to strengthen your family’s heritage!


1. Family Treasures Card game: This is a fun family game that has a playing board (laminated poster) that goes with it. To view the instructions click here.


2. I AM a Heritage Maker Activity Book: This is a great way for your kids and their cousins to get to know their heritage in a fun activity book.


3. Personalized Card Deck: Does your family like to play card games? Create your own custom deck of cards with pictures of grandparents, aunts, uncles, cousins, etc. There are lots of templates to choose from in the gallery (rook, old maid, go fish, face cards, etc.)


4. FAMILY LAND: This fun game is just like Candy Land, but with your family name and the family activities you enjoy doing together. It will keep the kids entertained for hours! Also, it has a deck of cards to go with it.


5. Family Cookbook: If you have time before the reunion, have family members send you a favorite recipe and a picture. Put together a family cookbook. Take the cookbook to the reunion and if family members would like a copy, you can take orders. If you don’t have time to put it together before the reunion, have your family bring their picture and favorite recipe to the reunion. Then put the cookbook together later.


6. BINGO: Create your own Bingo cards with pictures of grandparents and other relatives. This is a great way for the young kids to learn the names of their great grandparents.

Saturday, May 15, 2010

Have your photos scanned while at your reunion!

Attending a family reunion this year? Ask each family member coming to bring the pictures they have of Great grandma and Great grandpa, etc. (the pictures they don't let out of their site). I can scan everyone's pictures while at the reunion and then everyone gets a copy of everyones pictures and everyone goes home with their special photos- it's a win win for everyone! Of course you can always bring your photos to the shop where I offer scanning everyday!

Monday, May 10, 2010

How to make adjustments to more than one layer at a time

Adobe Photoshop or Elements Tip from Designer Digitals:

Multitasking; How to make adjustments to more than one layer at a time

You can also watch this tip on video on their blog: Digital Scrapbooking Tips and Tricks: How to make adjustments to more than one layer at a time Video

With today's hectic lifestyles, we are all looking for ways to get more done in less time. When you are working in Photoshop and Photoshop Elements, you can multitask by making changes to several layers at one time.

Begin by holding the Ctrl key (Mac: Cmd key) as you select all of the layers you want to adjust.

Next, hold the Ctrl and the Shift key (Mac: Cmd + Shift) as you click on the thumbnails of each of those layers in the Layers Palette.

Finally, select Layer > New Adjustment Layer and choose an adjustment like Black and White, Hue/Saturation, or Brightness/Contrast. When you make the adjustment, Photoshop and PSE will apply it to all of the selected layers ... multitasking at its finest!

Monday, May 3, 2010

Cascading; Three Ways to View Multiple Documents at Once

Adobe Photoshop or Elements Tip from Designer Digitals:

Cascading; Three Ways to View Multiple Documents at Once

You can also watch this tip on video on their blog: Digital Scrapbooking Tips and Tricks: Three Ways to View Multiple Documents at Once [Video]

When you see Niagara Falls, you can choose to view it from the New York side or the Canadian side. Each side has a different perspective, but both are equally magnificent.

When you open documents in Photoshop Elements, the default view allows you to see one large document filling the Editing Window. In order to drag layers from one document to another, you need to be able to see all of your open files at the same time.

There are several ways to do this, and Adobe refers to this orientation as cascading view. It may not be like the cascades at Niagara Falls, but it's helpful nonetheless.

In Photoshop Elements:
- Select Window > Images > Cascade. You can undo this by selecting Window > Images > Maximize Mode.
- Double-click the title bar of the top image. You can undo this by double-clicking the title bar again.
- Click the double-rectangle icon between the - and the X at the top right corner of the title bar.

- Clicking the icon again takes you back to maximize mode.

In Photoshop:
- Select Window > Arrange > Cascade for the cascading view.
- Double-click the title bar to enter Maximize Mode or click the Maximize icon between the - and the X at the top right corner of the title bar.
- To switch from Maximize back to Cascading view, click the Restore Down icon between the - and the X at the far right end of the Menu Bar.

Thursday, April 29, 2010

Interesting study on kids knowing their family history ...

Did you know...
that knowing about their family history helps kids cope?

Check out this post from Emory University:
http://futurity.org/society-culture/knowing-their-family-history-helps-kids-cope/

Thursday, April 15, 2010

Graduation Cards, Announcements & Invitations

Graduation is just around the corner! If you, or someone you know has left Graduation Announcements as one of the last things to do on the "To Do" list Heritage Makers can help. We have outstanding pricing on our cards and invitations as well as darling templates to make your graduate's announcement look amazing!

You can order the cards and invitations in groups of 10, 30, 50, or 100. The more you buy the better price you get. Keep in mind that if you ordered 100 cards, you don't have to use all 100 cards for graduation announcements. You have a whole year to use all of them, so you could even use the rest as Christmas Cards if you wished.

Here is the price break down:

7x5 Invitations (Prints on 2 sides, front and bacK)
10 = $14.95 ($1.50 each)
30= $40.35 ($1.36 each)
50= $59.75 ($1.20 each) (includes 1 month of premier membership)
100=$111.90 ($1.12 each) (includes 2 months of premier membership)

7x5 Cards (Prints on all 4 sides)
10= $24.95 ($2.50 each)
30= $67.35 ($2.25 each)
50= $99.75 ($1.99 each) (includes 1 month of premier membership)
100= $186.90 ($1.87 each) (includes 2 months of premier membership)

To see some fun ideas of what you can create using your Heritage Makers account click the links below:

Graduation card #1
Graduation card #2
Graduation card #3
Graduation card #4
Invitation #1

Remember that each template can easily be modified- you can change the colors to match the colors of the school and change the text so it says just what you want it to.

To order any of the card/invitation packages please contact me via email or phone to place your order as these specials aren't available online.

Thursday, March 25, 2010

How to Glue Layers Together

Adobe Photoshop or Elements Tip from Designer Digitals:

A Sticky Situation, How to Glue Layers Together

You can also watch this tip on video on their blog: Digital Scrapbooking Tips and Tricks: How to Digitally Glue Layers Together [Video]

When I scrapbook with paper and adhesive, I have two choices: Removable or Permanent tape. In Photoshop and PSE, I have the same two choices.

Linking layers is the digital equivalent of repositionable glue. To link two or more layers, hold the Ctrl (Mac: Cmd) key and click on the layers you want to link. Release the Ctrl (Cmd) key and click the chain link icon above (PSE) or below (PS) the Layers Palette. Now the layers will stick together like glue and can be resized or repositioned together. To unlink the layers, simply select the layers you want to unlink and press the chain link icon again.

Merging Layers is the digital equivalent of Super Glue. Once you merge layers, you can't undo it without going back a step or more in the History Palette. If you've completed a number of steps, this can cost you precious time, so make sure that you really want the layers together as one before you merge. To Super Glue two layers together, stack the layers one on top of the other and highlight the upper layer. Press Ctrl + E (Mac: Cmd + E) on your keyboard. This glues the two layers together.

To Super glue several layers together, hold the Ctrl (Mac: Cmd) key to select all of the layers you are merging and press Ctrl + E (Mac: Cmd + E).

Monday, March 15, 2010

How to hide the highlight on selected type in Photoshop

Adobe Photoshop Tip from Designer Digitals:

How to hide the highlight on selected type in Photoshop

You can also watch this tip on video on their blog: Digital Scrapbooking Tips and Tricks: Hiding the Highlight on selected type in Photoshop [Video]

When you are working with text in Photoshop, getting the text tool and highlighting the text allows you to do a number of things like change the color, size, or even the font. But the highlight on the text is like a halloween mask. It makes it difficult to see what the text looks like underneath.

Pressing Ctrl + H (Mac: Cmd + H) on your keyboard allows you to hide the highlight on the text, so you can clearly see what the effect will look like on your project as you apply it.

To see your text in a different font, first highlight your text, then highlight the font name in the Options Bar and press the arrow keys on your keyboard. If you take the extra step to hide the highlight on the text, you can clearly see how your text will appear on your project.

Sunday, February 28, 2010

Adobe Photoshop or Elements Tip of the Week from Designer Digitals

How to Save a Layer as a New Document

You can also watch this tip on video on their blog: How to Save a Layer as a New Document in Photoshop or PSE [Video]

When you are working on a multi-layered project, you occasionally run across layers you'd like to save to use on another project.

This is especially true when you have purchased layered templates where you'd like to save a title, text path or other element for use on subsequent digital projects.

You also may want to save a photo layer to which you have added effects, brushwork or restoration processes.

With just a few clicks, your layer can be duplicated as a new document. Here's how:

Select the layer you want to save. Right-click (Mac: Ctrl-click) on the layer in the Layers Panel. From the flyout menu choose Duplicate Layer to open the Duplicate Layer dialog box.

Under Destination, select New, give the image a name and click OK.

Your new image will populate in the editing window. Save the image in an appropriate file format and it will be available for you to use on other projects.

Wednesday, February 24, 2010

How to Print Several Items on One Page

Adobe Photoshop or Elements Tip from Designer Digitals:

How to Print Several Items on One Page

You can also watch this tip on video on their blog: How to Print Several Items on One Page [Video]

One way to save a few dollars is to print several cards, tags, or other projects on one page. Here's how:

Begin by creating a new document the size you want to print. For the sample, I created a new document by opening PSE and pressing Ctrl N (Mac: Cmd N) on the keyboard. In the "New" dialog box, I chose to create a letter-sized document at 300 pixels per inch in RGB color mode For the background contents, I chose "white."

You may choose a different size or background color based on the projects you have created and the size of your photo paper. Click OK to create the new canvas.

Open the tags, cards, or other projects you have created by choosing File > Open and browsing your computer for the files.

If your PSE Project Bin is open, you'll be able to see all of the open documents at once. You could also select Window > Images > Cascade to see all of the open documents in the editing window.

In Photoshop, the command to view all documents at once is Window > Arrange > Cascade. (Photoshop CS4 directions follow.)

Get the Move tool and click on one of your projects. If it is a layered file, choose Layer > Merge Visible or press Ctrl Shift E (Mac: Cmd Shift E) on your keyboard. Click and drag the flattened image over to your new document. Holding the Shift key as you drag will center the item on the new document.

In Photoshop CS4, drag your image from the workspace to the tab of your new composite document.

Repeat the process with the remaining open files.

Maximize your print document and arrange the items on the page.

You can duplicate any of the items by selecting the layer in the Layers Panel and pressing Ctrl J (Mac: Cmd J) on your keyboard. Select the new layer and drag it into place.

With your page filled, you are ready to print directly from Photoshop or PSE by choosing File > Print or press Ctrl P (Mac: Cmd P) on your keyboard.

From the Print dialog, you can enter even more choices by selecting Page Setup > Printer > Properties. This takes you to your printer driver where you can select the paper type, size, and borderless (if available.)

Saturday, February 20, 2010

Last week for "Share the Love" charity drive!

We're in the final stretch of our "Share the Love with Haiti" charity drive!

In conjunction with the “Fall in Love with Geneva” campaign in Geneva, Illinois, Image Awards & Engraving, Inc. is sponsoring "Share the Love with Haiti", a charity drive for the victims of Haiti. The company is matching, dollar for dollar, the first $500 in contributions collected at their store during the month of February, 2010.

Donations may be mailed or dropped off at their retail location:
622 W. State Street, Geneva, IL 60134

Please make checks payable to the American Red Cross.

Even if you can't contribute monetarily, you can still "share the love" by pasting this message into your newsfeeds, blogs or twitter accounts.

In the words of Stevie Wonder "A whole lotta little makes a whole lotta lot" !

We can make difference!

Wednesday, February 17, 2010

How to load and use Photoshop Brushes

Adobe Photoshop or Elements Tip from Designer Digitals:

How to load and use Photoshop Brushes

You can also watch this tip on video on their blog: Digital Scrapbooking Brushes and How to Load and Use them in Adobe Photoshop or PSE [Video]

Do you feel left out in the cold when it comes to Photoshop Brushes? Many of you have emailed us asking what to do with the ABR file that comes packaged with our brushes and stamp sets.

The designers aren't shivering out in the cold, when they create those ABRrrrr files - that's a file extension for Photoshop Brushes!

Begin by downloading and unzipping a brush set. Make a note of where you have placed the unzipped folder. To load the brushes into Photoshop or Photoshop Elements, select Edit > Preset Manager from the Menu Bar. This opens the Preset dialog. Choose Brushes for the Preset type and click the Load button.

Select from your computer by clicking the Look in: menu to find the .ABR brush file.

Click on the file name and select Load.

After this imports the brushes into the Preset Manager, click Done.

Since the brush uses the Foreground color as the "ink" color, click the Foreground color chip at the bottom of the Tool bin and choose a new color. Click OK.

To stamp with the brush, press the letter B on your keyboard to get the Brush tool or click on the Brush tool in the Tool bin.

Scroll to the bottom of the Brush Picker in the Options Bar to locate the brushes you just loaded.

Click on the brush you want to use. Choose your size in the Options bar and click on your project to stamp the brush image. (In Photoshop the size slider is located in the brush picker menu.)

Photoshop brush files are great because they can be used with any of the color and Retouching tools like the Clone Stamp, Eraser and Pencil tools.

Monday, February 15, 2010

Blog change of address :-)

Hopefully this will be relatively pain free ...

I've decided to move my blog posts to another address. I've done this because it seems more fitting given the names I use for my business, as well as my Facebook fan page. I felt like it should all tie in together.

So, here's the new address: http://creative-keepsakes.blogspot.com/

If you subscribe, you may want to change your subscription. I think the worst that can happen is you get double posts, as I do have some stuff set to be posted thru the end of the year(not sure, but I guess we'll find out together!:))

So here goes!!!

Patty

Wednesday, February 10, 2010

How to use digital frames

Adobe Photoshop or Elements Tip from Designer Digitals:

How to use digital frames

You can also watch this tip on video on their blog: Digital Scrapbooking Frames and how to use them in Adobe Photoshop or PSE [Video]

If you are trying to frame a photo, here are a few pointers that make the task a bit easier. Begin by opening a document the size and shape of your choice. Open a photo and the digital .png format frame you want to use.

Make the photo the active document. Get the Move Tool and drag the photo down onto the new document. Next, make the frame the active layer and drag it onto the new document on top of the photo. If it comes in under the photo, simply drag the photo layer under the frame layer in the Layers Panel.

Target the photo layer and use the corner handles to resize the photo. Use the side handles to turn the photo, if needed.

Your photo may be sticking out behind the frame. To delete the section behind the frame, you can get the Eraser tool and use it to erase away the excess photo. A faster way, however, is to target the frame layer. Get the Wand tool and click inside the frame.

Select the inverse by pressing Ctrl Shift I (Mac: Cmd Shift I) on your keyboard. Now target the photo layer and press the Backspace or Delete key on your keyboard.

Note: If the frame contains a drop shadow, you may need to increase the size of the selection by choosing Select > Modify > Expand. Set the expansion to a few pixels - enough to include the shadowed section.

Next week we'll continue with a tutorial on how to load and use a digital brush.

Tuesday, February 9, 2010

Photo Tiles


Tiles: Create a tile with a picture of an ancestor or of grandma and grandpa that includes one of their favorite sayings. 1 12×12 page can make 4 tiles. Get 4 6×6 tiles at Home Depot or any home improvement store.

Monday, February 8, 2010

Gift Ideas

8x8 book Summer Fun - What are you doing with your summer memories and pictures? Put them in a book and give it to your family as a Christmas gift.

11.5x8.5 Family Yearbook - Capture the year in a beautiful storybook that will be read for years to come AND be guilt free because you did something with your pictures.

Cookbook/planner - Gather favorite family/friends recipes and create a cookbook to give to friends on their birthday or to your mom/grandma for Christmas.

12x12 pages There are lots of fun home decor ideas you can do with 12x12 pages - this template is for a photo cube.

Fold Outs - Great gift for kids friends birthday parties or for grandma/great grandma for Christmas

Invitations/Postcards - Frame your invitation and give it to a friend or loved one.

Greeting Cards - Send a thinking of you card, get well soon, thank you card or just because card to someone you love. With Heritage Makers direct shipping you won't even have to leave your home!

Friday, February 5, 2010

How to use the Warp Tool in Photoshop or the Liquify Filter in PSE

Adobe Photoshop or Elements Tip from Designer Digitals:

How to use the Warp Tool in Photoshop or the Liquify Filter in PSE

You can also watch this tip on video on their blog: How to use the Warp Tool in Photoshop or the Liquify Filter in PSE [Video]

If you are looking for a fun way to add a little treat to your photos, try playing dress up in Photoshop! Adding fun elements like hats to your favorite subjects is quick and easy, but gives your photos a dramatic punch. Learning to use the Warp tool will help you make the hats fit onto your subjects' heads, making them look as if they belong there.

Begin by downloading images from the internet like these fun hats by Pattie Knox at Designer Digitals.

Felt Board Friends: Mad Hatters Christmas

Unzip your download, making a note of where you have stored the unzipped folder.

Open a photo and the hat images in Photoshop by selecting File > Open and browsing your computer for your unzipped folder. Select all of the images you want to import and click Open. The files will populate in your editing window.

Get the Move tool and drag a hat onto your photo. Resize the hat if needed by holding the Shift key as you drag a corner handle. The side handles can be used to twist or turn the image, but should not be used to resize it since it can distort the image.

Zoom in close to your hat by pressing Ctrl + (Mac: Cmd +) several times. Then select the hat layer and choose Edit > Transform > Warp to activate the Warp tool. This places a grid over your image.

Select Warp: Custom in the Options bar and then use the Move tool to click and drag the squares of the grid until the hat is form-fitted to your subject's head.

When you are satisfied, click the check mark in the Options Bar to confirm the warp.

The Transform >Warp tool is available only in the full version of Photoshop. If you are working in Photoshop Elements, you can get reasonably good results using the Liquify Filter.

After dragging the hat onto the photo with the Move tool, select the hat layer and then choose Filter > Distort > Liquify from the Menu Bar. Click the Warp tool which looks like a pointer finger and use it to push the pixels forward. In the Tool Options section, adjust the brush size and pressure of the tool, as needed.

Click OK to apply the changes to your actual image. You'll need to use trial and error to get the warp right since you can only see one layer at a time in the filter.

If you enjoyed playing with paper dolls when you were young, this technique is sure to bring back a few happy memories.

Monday, February 1, 2010

Share the Love with Haiti

Share the Love with Haiti this February!

In conjunction with the “Fall in Love with Geneva” campaign in Geneva, Illinois, Image Awards & Engraving, Inc. will be sponsoring "Share the Love with Haiti", a charity drive for the victims of Haiti. The company will match, dollar for dollar, the first $500 in contributions collected at their store during the month of February, 2010.

Donations may be mailed or dropped off at their retail location:
622 W. State Street, Geneva, IL 60134

Please make checks payable to the American Red Cross.

Even if you can't contribute monetarily, you can still "share the love" by pasting this message into your newsfeeds, blogs or twitter accounts.

In the words of Stevie Wonder "A whole lotta little makes a whole lotta lot" !

We can make difference!

Saturday, January 23, 2010

Verse a Day

Verse a Day Submitted by Tanya Teichroeb

Using a deck of cards, create a pack of inspirational thoughts. You can decorate the cards with scenic or family photos. Then, put the deck in a business card holder. You can put the cards in the window or on your desk. Then just rotate the cards for a new inspirational thought. You have enough cards to rotate for 54 days or weeks.

Make your own at http://www.MakeYourMomentsLast.com

Wednesday, January 20, 2010

Placemats


Placemats -
Need: 12x12 Individual Scrapbook pages, laminate at local print shop
Ideas:
-One for each family member with highlights of year with photos and stories.
-Easy gifts for family and friends
-Family and Class Reunions
-Back to School
-Birthday Parties - Party Favors
-Thanksgiving

Sunday, January 17, 2010

How to fade filters in Photoshop and PSE

Adobe Photoshop or Elements Tip of the Week from Designer Digitals:

How to fade filters in Photoshop and PSE

You can also watch this tip on video on their blog: How to fade filters in Photoshop and PSE [Video]

We all have a pair of favorite jeans - the comfy ones that started out with a deep blue hue, but each memory you've made in them has faded them just a bit. A family picnic, going to the show, pizza and video nights have rendered them the perfect shade of blue.

Like the color of your jeans, you can make your Photoshop filter effect the perfect intensity as well.

Last week's tip covered how to multiply filter effects by re-running them. Today's tip helps you fade the filter down when the effect is too extreme.

To begin, open a photo in Photoshop and select Filter from the Menu bar. Run a filter by clicking the category and filter name. Make adjustments in the filter dialog box and click OK.

To fade the effect, press Ctrl Shift F (Mac: Cmd Shift F) on the keyboard. This activates the Fade dialog box. With the Mode set to Normal, move the Opacity slider to achieve the look you want.

Using this shortcut allows you to decrease the intensity of your filter without having to undo and readjust the filter settings by opening the filter dialog.

In Photoshop Elements, the best way to fade a filter is to use the Layers Panel Opacity slider feature using these steps.

Open a photo and duplicate it by pressing Ctrl J (Mac: Cmd J) on the keyboard.

Target the photo copy and run a filter.

Decrease the opacity of the filter layer by dragging the Opacity slider(in the Layers Panel) to the left.

Some Photoshop users prefer this method since it's a nondestructive way of fading filters.

I find this shortcut especially helpful when I have rerun a filter. Sometimes once is not enough, but twice is too strong. Fading the rerun might give you just the concentration you want.

Friday, January 15, 2010

Scanning Services

We can scan all those old photos and you can start sharing all those memories today!

Simply drop 'em off (or mail them to us) ... we'll take care of the rest.

Image Awards, Engraving & Creative Keepsakes
622 W State St
Geneva, IL 60134

Monday, January 11, 2010

How to Re-Run Filters in Adobe Photoshop and PSE

Adobe Photoshop or Elements Tip of the Week from Desinger Digitals:

How to Re-Run Filters in Adobe Photoshop and PSE

You can also watch this tip on video on their blog: How to Re-Run Filters in Adobe Photoshop and PSE [Video]

What fun I've had with my family during the holidays, snuggling up on the couch and watching re-runs of all of our favorite Christmas shows.

It's fun to watch Photoshop re-runs, too. When you are working with filters, you can run the filter again using an easy shortcut.

To begin, open a photo and select Filter from the Menu bar. Run a filter by clicking the category and filter name. Make adjustments in the filter dialog box and click OK.

To exaggerate the effect, rerun the filter by pressing Ctrl F (Mac: Cmd F).

If you have the History panel open, you'll see that the filter has been added a second time. Looking at the photo, you can see that the filter effect has been doubled, as well.

You can also run the effect on another photo by opening a second photo and pressing Ctrl F (Mac: Cmd F).

Until you run a different filter or restart Photoshop, the shortcut will continue to run the last filter using the setting adjustments.

To run the same filter with new adjustments, simply click Ctrl Alt F (Mac: Cmd Opt F) to run the filter with the filter dialog box.

I find the filter re-run especially helpful when running filters like Unsharp Mask. Sometimes one pass is not strong enough to achieve the effect you want. Now you'll know how to multiply the effect with just two keystrokes.

Saturday, January 2, 2010

Magnetized Organizer

Magnetized Organizer - Images and instructions attached- If you would like the template, please check the Template Gallery - if not found, please contact me and I will get it to you.

Name Decor

Name Décor - Image and instructions attachedTemplate in Template Gallery

Friday, January 1, 2010

a Dozen things to do

Have a crafty urge but not sure what to do with it? Looking for fun, new projects to start this summer? Looking for new ways to use Heritage Makers Products?


Look no further. We've got a dozen ideas that will keep your craft crave busy.


Sometimes the best way to find a story is to make the story. You can have tons of fun by making games, books, and decorations for family time, your business, clubs, and more. You can even bring the family into all the fun. Laugh, sing, and play together while creating lasting memories. And who knows, the time you spend together creating may make a perfect addition to your book collection.


#1 - 54 IDEAS FOR PLAYING CARDS


SUBMITTED BY BECKY LOGAN


Becky has some great ideas for playing cards and is making a deck to illustrate 54 examples. Already she has completed 21 cards.Her deck includes: 1) Girl Calling Cards, 2) Boy Calling Cards, 3) Adult Calling Cards, 4) Kid Gift Tags, 5) Adult Gift Tags, 6) Christmas Gift Tags, 7) Valentines, 8) Boy Chores, 9) Girl Chores, 10) Kid Coupons, 11) Love Coupons, 12) ABC Flash Cards, 13) Math Flash Cards, 14) Address Change Cards, 15) Graduation Contact Cards, 16) Conversation Starters, 17) Place Settings, 18) Book Loan Cards, 19) Seed Reminders, 20) Luggage Tags, 21) Room Fairy Cards, 22) Family Trivia, 23) Business Cards, 24) 52 Weeks To Do, 25) Fly Lady Routines, 26) Clue Game, 27) Sports Trading Cards, 28) Punch Cards, 29) Trivia, 30) Matching Game, 31) Birth Announcements, 32) Exercises, 33) Year Round Fun, 34) Prayer Reminders, 35) Recipes, 36) Dry Mix Ingredients, 37) Bible in a Year, 38) Lunch Notes, 39) Teacher Passes, 40) Teacher Gifts, 41) Coach Gifts, 42) Sales Motivation Cards, 43) Scavenger Hunt, 44) Grocery Staples, 45) Graduation Invites, 46) Thank You Cards, 47) Courtesy of... 48) Sports Plays, 49) Kids Art Work, 50) Bucket List, 51) Alzheimer's Patient Memory Cards, 52) Family Reunion Name Cards, 53) Dog Play Dates, and 54) Gift Cards.

#2 - PARTY PLANNER


SUBMITTED BY GENE K. IRONHILL


Gene is going to create a party planner with the cookbook/journal. The party planner will include sets of pages to write in checklists for food, decorations, themes, notes for future parties, etc. Another section will be for jotting down ideas, another for lists of websites to check out, another for favorite drink and food recipes, and yet another to place ideas pulled from magazines.

#3 - AMERICAN FLAG


SUBMITTED BY ANNIE GOLDMAN


Using the 18x24 poster and over 225 family photos, Annie made an American flag


#4 - BABY'S FIRST YEAR


SUBMITTED BY IVY BRIDGES


Using the 18x24 poster and over 225 family photos, Annie made an American flag.


#5 - "FAMILY TALK"


SUBMITTED BY KIM BERWALD-VIAR


Kim created a game for elementary age kids with the playing cards. "Family Talk" uses all 52 cards, each with a different question on it. The questions are used as conversation starters for dinnertime with the children. Each night they pull one card from the deck and everyone at the table answers the question.


Examples of questions are:
What is peace?
Which one of the Seven Dwarfs are you most like?
When you have a problem, who can you go to?
What is your best motivator?
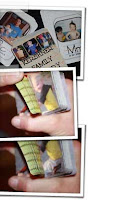


#6 - TRADING CARDS


SUBMITTED BY MARY BETH LOVEJOY


"I participate in Agility Training and Trials with my golden retriever Marley. When we register and get called to the line it is always done in the dog's name. Hence, all of the participants tend to remember the dogs, not the humans."I have used the playing cards to create trading cards that have a photo of the dog participating in agility and any information about the dog such as birth date, owner's name, titles earned, recognitions, accomplishments, etc. Because playing cards come in packages of 52, a couple owners have ordered together; each takes a suit or two, making the product affordable to most participants."I have also used this product as one of the items I use in raising funds for our club."


#7 - BROCHURES SUBMITTED BY KIM BERWALD-VIAR


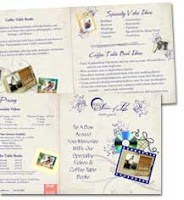
Kim created something a little different with the 3 Fold. She owns a specialty videography company and needs, not a lot of brochures, just about 100. The problem is that the brochures are always changing and she has to use different ones for different trade shows and other events.So, she made brochures using the 3 Fold. The custom-made brochures work perfectly and are nice quality—better than printed tri-folds from her office printer or from an expensive printing company. The 3 Folds work great for Kim's business plan and she sees a lot of potential for company and personal use.


#8 - CHRISTMAS ORNAMENTS


SUBMITTED BY LYNN THIBAULT


Last Christmas Lynn used the playing cards to make Christmas ornaments. She put a picture of her kids on one side and on the other she put warm wishes. When she received the printed cards, she hung a plastic snowflake on the bottom of each card. She added a hook at the top and hung the card ornaments on the tree. Her family and friends loved the idea and this year want to give Lynn a picture of themselves so she can make new ornaments to add to her tree.


#9 - LEARNING CARDS


SUBMITTED BY CATHI KERSHNER


Cathi is a home school mom who found a great use for the playing cards. She split the deck in half and used 26 cards for the printed alphabet and the other 26 for the cursive alphabet. The cards are great for practice and memory games.


#10 - FLIP BOOKS


SUBMITTED BY ANNA DEMILLE


Anna used a camera that takes rapid shots to take pictures of her kids. She used the pictures and the playing cards to make flipbooks. Her kids love it. She says, "It's like handheld movies of themselves."


She also came up with the idea for two other great ideas:
Use two 3 Folds to make a giant die
Make a message board by wrapping ribbon in a diamond pattern around one of the wrapped canvases; reinforce the back with a few layers of corkboard.


#11 - LEGACY BOOK


SUBMITTED BY SANDY MANGANI


"A picture of my deceased parents hangs on the wall in my living room and my four year old and I talk about them often. Not a day goes by that he doesn't look at those pictures and mention a story I've told. With that in mind, I'm always looking for that perfect Christmas gift for my brother and sister. Their needs are met and it's not easy to find the gift they will truly enjoy."So, I put the two ideas together. A storybook of our parents' legacy begins with them as children, outlining some significant events in their life while growing up, while in the military, going to school, their wedding, their children, and their grandchildren. I asked each sibling to write favorite memories to include. The most fun was learning what character trait each of them believes they have from each parent. I thought this would be a perfect way not only to memorialize my parents' enriching life, but a way for us to keep their memory alive through stories with their grandchildren, some of whom never got to meet them. I plan to give a book to each family for Christmas."


#12 - FAMILY REUNION RECAP BOOK


SUBMITTED BY WENDY K. BROWN"


Last year at our Peterson family reunion we had everyone write [their] memories and how they are related [to the family] on sheets of colored paper. Then we scanned them. We also took many photos."I am compiling some old, rare photos of generations past and new photos from last year—as well as the papers that were written last year. I will leave some room [in the book] for more notes from this year. I will also be putting in the back a list of all known contact info and leave room for any additional info."