Tuesday, December 29, 2009

Card Party!


Now You Can Create a CUSTOM Card for EVERY Occasionand For Less Than a Store-bought Card!


* use a pre-designed card template from the Template Gallery - hundreds to choose from!


* design your own card from scratch.


* use "Direct Shipping" to send your card directly from your computer to the recipient. So handy!


You don't even have to leave your home! Get your favorite summertime drink, sit back and login to see how you can create - and even send! - your own beautiful, custom cards - right from your computer!


These are NOT eCards. These are high-quality with satin finish and non-crease coating. You can customize EVERY side! PLUS, every card, announcement or invitation you create comes with a FREE felt-weave envelope!

Shortcuts for Creating New Layers in Photoshop and PSE

Another great tip from Designer Digitals:

When you are working in Photoshop and Elements, you can start fresh with a new canvas or layer.

Pressing Ctrl N (Mac: Cmd N) on your keyboard creates a new canvas with a dialog box to allow you to make choices about the size, resolution and background.

Pressing Ctrl Shift Alt N (Mac: Cmd Shift Opt N) creates a new transparent layer the size of your document. The new layer will be created one position above the selected layer. Clicking the Create a New Layer icon in the Layers Panel performs the same function.

Press Ctrl Shift N (Mac: Cmd Shift N) to open the new layer dialog box so that you can name the layer, select the blending mode and opacity as well as creating a clipping mask with the new layer. Holding the Alt key (Mac: Opt key) as you click the Create a New Layer icon in the Layers Panel gives you the same dialog box.

To create a new layer one position below the selected layer, hold the Ctrl key (Mac: Cmd key) as you click the Create a New Layer icon.

Saturday, December 26, 2009

How to Adjust the Leading in Lines of Text

Taken from Designer Digitals e-newsletter:

The vertical distance between the lines of text is called "leading" which is easy to remember once you realize that the word comes from a time when type was set by hand in printing presses. Strips of lead were inserted between the lines of text as spacers, so line spacing has become known as leading.

Increasing the vertical spacing makes your text easier to read and can help you fill in a journaling space when your story doesn't contain many words.
Begin by using the Move tool to drag a journaler onto your scrapbook page. Get the Horizontal Type tool and choose your font name, style, size, and color in the Options Bar. Click on the top left corner of your journaling block and type your text.

When you are finished, highlight the text and move your cursor to the Options Bar across the top of the editing window.

In Photoshop Elements, you can either choose a leading from the leading drop-down menu or position your cursor over the leading icon until it becomes a horizontal arrow. Moving this scrubby slider to the right increases the distance between lines, while moving it to the left decreases the distance between the lines. Watch your text alignment change as you scrub from left to right until it aligns with the lines on the journaler. Click the green checkmark in the Options Bar to confirm the leading.

In Photoshop, choose the Paragraph and Characters palette icon in the Options Bar (or select Window > Character) and view the Character tab. Choose a leading from the leading drop-down menu or use the scrubby slider to adjust the distance between the lines. Click the checkmark in the Options Bar to confirm the leading changes.

Tuesday, December 22, 2009

Make your own Snowglobe Ornament

This fun DIY project is from the equally fun Photojoto newsletter. Enjoy!


Step 1: Drink Up!
First, empty out the liquor bottles. Drink as many as you can in the space of five minutes.
Repent. Rethink. Repeat.
When you’re done, peel off the labels, wash the bottles and let them dry inside and out.
Take two aspirin and a nap. Then move on to Step 2.


Step 2: Mixology
In a container that has a spout, mix equal parts of corn syrup and water.
Make enough liquid to fill all the snowglobes you want to make.


Step 3: Sparkle Sparkle!
Fold a piece of paper of scrap paper in half. Pour some glitter* into the the valley of the fold.
Now use the creased paper like a funnel to help you pour glitter into the bottle without spilling it everywhere.
*FYI, you can make realistic-looking “snow” by shredding a white PVC pipe with a cheese grater. Weird, right?


Step 4: Cut ‘Em Down to Size
Crop your photo to that size in Photoshop (or whatever program you’re into these days).
Print the photo and use scissors to cut it out.


Step 5: Seal ‘Em Up
Waterproof the photo by covering it completely with packing tape. Cover both sides and make sure there’s nowhere for water to seep in.


Step 6: Roll ‘Em Up
Roll the photo up small enough to fit into the neck of the bottle. Bending it around a pencil helps.
Insert the rolled-up photo into the bottle. The photo should flatten out on its own, but if it doesn’t, use the end of the pencil to poke it back into shape.


Step 7: Fill ‘Er Up
With a steady hand (see why you needed a nap?) pour the liquid carefully into the bottle.
Fill it up to the top, then put the cap back on the bottle.


Step 8: Tie It Off
Cut a 5-6″ length of colored string, and tie a knot around the neck of the bottle. Then tie a larger loop so you can hang your ornament on the tree.


Step 9: Hang ‘Em High
That’s about it! Go hang your fabulicious new ornament on your Festivity Object of choice, be it Kwanzaa tree, Christmas shrub or Festivus pole. Happy holidays!

Monday, December 14, 2009

Gift Certificates

* Gift Certificates - Though publishing deadlines may be passed or coming soon, giving a Heritage Makers Gift Certificate allows for ultimate creativity for the recipient to preserve and share their photos and stories however they wish in the product that is given. Contact me or visit my web site for this season's specials & new products. http://www.MakeYourMomentsLast.com

Thursday, November 12, 2009

Fun Reunion (or whenever) project!


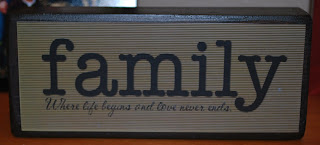
BLOCKS: Create your blocks to say whatever you want... does your reunion have a theme? If so make a block per family or per kid with the theme or family moto. 1 12x12 page will make 5 blocks, then cut a 2x4 into 7 in blocks.

Sunday, November 1, 2009

Family Clock Project


FAMILY CLOCK: Super easy and a great addition to your home. This is made using 1 Heritage Makers 8x8 page and a 9 inch clock.

Thursday, October 29, 2009

How to Photograph a Ghost — A Spooky Photographic Trick (That’s Quite a Treat)!

A fun & timely tip from the folks at Photojoto ...
(This idea came from reader Julliette)

This tutorial is not for the faint of heart.
We’re about to tell you how to photograph a ghost and it’s going to be terrifying(ly simple).

In just three little steps you can have a photo of a real live ghost that looks a lot like one of your real live friends.

A photo so spooky it’ll send you running for mommy (to get her to pose for more ghosty photos).

Step One: Take your best shot (and then take it again)!
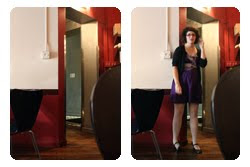
This is the big secret right here.

Don’t tell anyone, but you’re going to need to take two photos of almost the exact same thing.

You need one photo of your friend (soon to be ghost) and a photo of the exact same thing, minus the friend.

The easiest way to achieve this is to put your camera on some kind of tripod, or set it on a table, or on the ground. Anywhere stable really (i.e. not your hot little hands).

Now that your camera is stable, take a photo. Done.

Make sure everything in the shot stays consistent. No cars driving by in the background, no wind blowing the trees every which way, no gophers poking’ their darling little heads up out of the ground…

Now, put your buddy in front of the lens and take a second shot.

Step Two: Layering (easy as cake)


So, once you’ve got the two photos into your compy, it’s time to layer away.

You want to get the photo with your friend layered on top of the photo that is friend-free.

You can use Photoshop or Gimp or any program that lets you work with layers.

The process is pretty simple: Open photo number one (no friend). Open photo two (hello friend!). Select-all of photo two and copy. Now click back on over to photo one and paste.

Shazam. Magic. A new layer is born.


Step Three: Hold on to your hat

It’s about to get spooky. Just adjust the opacity of the top layer to somewhere around the 50% mark.

In Photoshop and Gimp, the opacity slider is right on the layers palette. (You can see it up there in the photo for step two).
Everything that is in both layers will look just the same. Your friend will fade… What you’re left with is one friendly ghost!
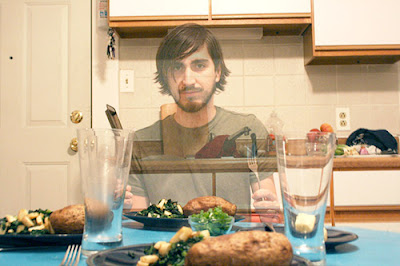


Step Three.2: Bonus!

Turn your pal into a headless horseman!!! No head! Probably, no horse either (unless you have access to a ranch).

Follow steps one and two and then… Bust out that eraser tool.

Simply erase away your friend’s head. No head!

Monday, October 26, 2009

Memory Box Project


SPECIAL MEMORIES BOX: This is a great way to keep all your favorite cards, notes, letters, etc. all in one place. This is made using 2 Heritage Makers 12x12 pages and a 7in craft box (available at craft stores).

Sunday, October 25, 2009

Scrap by Color


Here's another cool gadget that helps you plan the colors to use in your layouts by extacting them from the photos you'll actually be working with. This one is from Scrapbook.com & works like the Color Palette Generator I blogged about in an earlier post. Give it a try & see if it sparks your creativity!


http://www.scrapbook.com/color/utm_source=bronto&utm_medium=email&utm_term=Scrap+by+Color&utm_content=PATTYD16%40HOTMAIL.COM&utm_campaign=Products+You%27ll+Love+%28October+20+2009%29


Saturday, October 24, 2009

HGTV Halloween Photo Contest


HGTV is hosting a halloween photo contest that sounds like fun. Here's the link if you'd like to try your luck!


Saturday, October 17, 2009

How to scroll up and down your brush list

The Brush Off, How to scroll up and down your brush list - Another tip from the Designer Digitals Newsletter

Are you brushing up on your brush skills? Here are a couple of tips I've incorporated into my brush workflow that help increase my productivity.

1. Always create your brushwork on a new transparent layer. Click the Create a New Transparent Layer icon in the Layers palette before using a brush. Doing this allows you to delete the brushwork if you later decide you do not want it on your project. And it allows you to change the blending mode or color of the brushwork easily.

2. When you are working with a brush set, you can scroll through all of the loaded brushes using the arrow keys on your keyboard. Just select the Brush tool and hover the cursor over your open document to see the outline of the brush. Use the right arrow key to scroll through the rest of the set. Your cursor will take on the shape of the brushes as you scroll, allowing you to find just the right brush for your project. Use the left arrow key to scroll back through the brushes in the set. Click once on your document to apply the brush to your new transparent layer.

Thursday, October 8, 2009

Off-the-Wall Guide for Fantastic Framing

I got this fun idea from my Photojoto newsletter ... I think I'll give it a try!
Our Off-the-Wall Guide for Fantastic Framing
(via reader Michael Galpert)

Find a frame

Any frame will do for this project. We found tons of great options at our local thrift store. And you can always look around online, where options abound. You want it to be small enough to fit in the shot if you hold it out at arms length in front of your camera, and big enough to fit a friend’s face. We found a typical friend’s face to fit nicely in an 8×10 frame.


Take it out on the town

Simply hold the frame out in front of your camera or have a passing stranger hold the frame up for you. A friendly grin and a polite “please,” will convince just about anyone to hold up a frame for a minute. Not sure who to ask? We’ve found that a person with a camera around their neck is usually more than willing to do a favor for a fellow photographer.

Frame your Friends

Once your arm gets tired from holding your frame out in front of the camera, pass the frame around to friends and neighbors and let them do the heavy lifting. They can frame themselves, frame each other, frame the dog. Play a quick game of how-many-friendly-faces-fit-in-one-frame?


Think outside the box

Box, Frame, same idea. Some people will assume that if they’re not behind the frame, their not in your shot. The area outside of the frame can be even more interesting than what’s in it. Catch your friends’ true reactions to your photographic antics.


Technical Tips:

FlashIf you’re shooting a bright scene, but you’re standing in the shade, use the flash to brighten up the frame.

Focus CarefullyMake sure to focus on your subject before you hold the frame in the shot. If you’re using auto focus your lens might focus on the frame and not the intended subject.

Fall Photography Tips

Ready to take great Fall photos? Here are some tips from Scrapbook trends newsletter.

1. Set your camera to landscape mode. If the automatic flash triggers, it will wash out all the beautiful color. Set your camera on a tripod if the shutter speed needs to be lower.


2. Morning or evening will provide the best possible light, especially if there are people in your photo. Bright daylight tends to cast heavy shadows across faces. Overcast days are also great!


3. Use the colors as a background – use a tangled old tree, a wooden fence or wandering stream as your main subject and let the fall colors be a beautiful backdrop.


4. Get close to the leaves – instead of trying to capture the entire landscape, find one vibrantly colored tree and photograph the leaves up close.


5. If you're taking family pictures in the fall leaves, dress for the occasion. Warm scarves and knitted hats give the impression of a crisp autumn day. Choose warm neutrals (creams, browns and tans) so that clothing doesn't compete with the vibrant background.

Wednesday, September 30, 2009

Photoshop "Home" short cut

When you are working on a digital project in Photoshop and Photoshop Elements, going "home" means reaching the top left corner of your open document. To get there quickly when you are working, press the Home key on your keyboard. The software will reposition the page in the editing window so that you are viewing the top left corner of the document.


Similarly, Photoshop and PSE consider the bottom, right corner the "end" of the document. Pressing the End key on your keyboard will reposition the document so that you are editing the bottom, right corner.


Using these shortcuts will help you quickly navigate to key points on your document.

Tuesday, September 8, 2009

“X” Marks the Spot – Finding Backyard Photo Treasures

I found this interesting & thought I'd share ... it's from DigitalPhotographySchool.com

In this post Bobby R. Strange shares some tips on finding photographic gems in your own backyard.


We’ve all heard stories of grand treasures being found by following the “X” on the treasure map, but how far do we have to travel from the comfort of our homes to uncover the treasure that is a wonderful photo opportunity? 100 miles? 1000 miles? Try 50 feet! I know what you’re thinking…50 feet from where my favorite slippers are isn’t exactly an exotic locale. But it can be just as rewarding! There are many photo “treasures” to be found in our own backyards if we just take the time to explore them. I think many times it’s just a matter of not seeing the trees for the forest (yes, you heard me right). We walk outside and take in the whole scene without seeing what makes up our own little part of the world. Other times it may be that we just don’t think there are little hidden gems right outside our bedroom windows.


So how do we find these treasures? Here are a few tips that helped me when I first started exploring my yard…

1. Probably the biggest tip that’s helped me is to just stop and take a look around. “Smell the roses”, so to speak. Just because you’ve been outside doesn’t mean you’ve noticed everything that’s there. Which brings us to tip #2…

2. Pick a spot in your yard and look at everything within arms reach. Find something interesting? That’s your “X”…take a picture of it! You’ll be amazed at what you start to see if you just pick a spot and look around that one area.

3. Try to see your yard through a child’s eyes. Kids don’t analyze why they want to build that sand castle. They just do it because it’s fun and interesting to them.


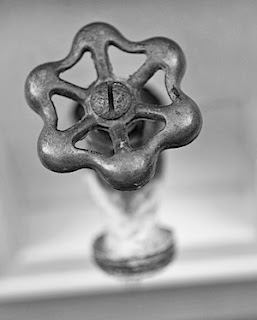
4. Think small. Little things like a rusty door hinge, a lady bug on a leaf, or even an outdoor water faucet can make wonderful images. And all three of these things can be found outside most houses.

5. When you find your “X”, shoot it from different angles. Walk all the way around it if you can and see it from all sides. One subject can sometimes give you more than one great image.

6. And if you live in a city and don’t have any kind of yard? Go to the park. Most cities have at least a small park located near residential areas.


See, you don’t need an eye patch or a parrot on your shoulder in order to find those photo treasures (although they may make the hunt more fun!). All you really need is a willingness to stop and take a look around at the things you overlook every day. There are many little treasure maps to explore right outside your door. In fact, I recently “set sail” on my own backyard photo treasure hunting expedition and discovered the “treasures” you see below. So grab your camera, throw on your pirates cap (optional), and embark on your next great adventure…in your own backyard.

This post was contributed by Bobby R. Strange - see more of their work at their gallery here.

Monday, September 7, 2009

Moving Layers tip from Designer Digitals

Adobe Photoshop or Elements Tip of the Week:

Photoshop Ups and Downs: How to Move Layers in the Layers Palette

You can also watch this tip on video on our blog: Digital Scrapbooking Tips and Tricks: Shortcuts to Move Layers [Video]

On a recent outing to an amusement park, I rode the beautiful, old-fashioned carousel with my son. After a few rounds I found myself asking what was so appealing about the repetitive up and down, round and round motion. Thankfully the ride ended before I turned green. And fortunately, there are shortcuts for moving layers up and down in Photoshop and Photoshop Elements that are quick and easy!

When you move a new image onto your Photoshop or Photoshop Elements project, the software places it one layer above the selected layer. Sometimes this hides the new image behind existing layers.

You can move the new layer up in the hierarchy several ways:

Click and drag the layer up in the Layers Palette
Press the Ctrl + Right Bracket ] key (Mac: Cmd + ] key) to move the layer up one position. Repeat the keystrokes until the layer is in place.
Press Shift + Ctrl + Right Bracket ] key (Mac: Shift + Cmd + ] ) to move the layer to the top of your project.

To move the layer downward in the hierarchy, use the opposite commands
Click and drag the layer down in the Layers Palette
Press the Ctrl + Left Bracket [ key (Mac: Cmd + [ key) to move the layer down one position. Repeat the keystrokes until the layer is in place.
Press Shift + Ctrl + Left Bracket [ key (Mac: Shift + Cmd + [ ) to move the layer to the bottom of your project.

Saturday, September 5, 2009

Creative Cropping - from Digital Scrapbook Place September Newsletter

Digi-Scrapper Inspiration by Meg


Creative Photo Cropping

Cropping is one of the most elemental and useful photo processing choices. It can serve many purposes: resizing a photo to fit a page, removing distracting elements or backgrounds from a photo, creating a new focal point, etc. In scrapbooking, there are many design elements that need to work together to create an artful, balanced page. How you choose to crop your photo can help it stand out amongst all the other elements. Take a look at the difference between the original and cropped version of this photo:


This was a simple snapshot, one of many that were very similar. Notice how simply cropping in the edges (and changing the photo's orientation from horizontal to vertical) brings the focal point in to the face and takes the photo from a snapshot to a portrait.

Cropping can also add interest, energy, and mood to a photo. That impression will transfer to the entire layout. Don't be afraid to dissect bodies and buildings! Cropping in extra tight or at unusual angles will bring the viewers' eyes to a focal point they might have otherwise overlooked.
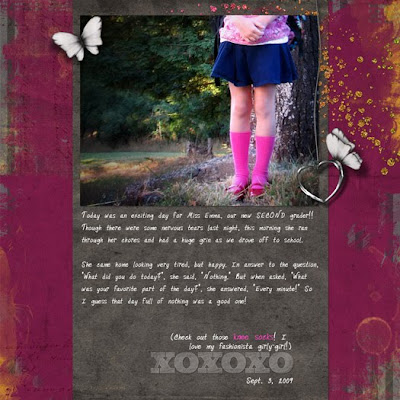
The photo in the above layout is from my daughter's first day of school last year. Do I have pictures of her that show her smiling face? Sure I do! And those are the ones that were sent to all the grandparents. But for me, and this layout for our family album, I wanted to show her personality. Her clasped hands display some of the nervousness she was feeling that day. And the crooked knee socks, well, those were just too cute, I had to highlight them! Remember: emotion and attitude are conveyed through all body parts, not just the face. In fact, we're all so used to "smiling for the camera", that sometimes the facial expression is not what your subject is truly feeling. Be sure to look for the body language that reveals more information.

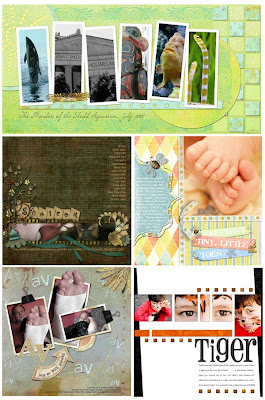
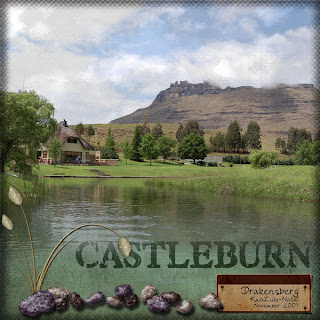
Check out the photos on the following layouts and be sure to try creative cropping with your own photos. It's a simple tool that can add a huge punch of interest!

Friday, September 4, 2009

The Fabulous Fade - from the Digital Scrapbook Place September Newsletter


Digi-Scrapper Inspiration by Mandy


The Fabulous Fade.


Using a gradient mask to create a fast eye-catching graphic layout.


One simple yet effective tool in our digitalscrapbooking arsenal is the gradient mask. An easy starting point to try out a gradient mask is with a single photo faded into a background.
I created my layouts in both Photoshop (CS3) and Corel Paint Shop Pro X (the programs I use on my computer) but I am sure you will find gradient masks or the equivalent in the package you use.

Open your layout, position your background paper and add your photo layer. From your Layers Palette/Menu, add a layer mask.


Remember: masks work with BLACK and WHITE. Black will hide areas under the mask, and white will reveal. Shades of gray will give you the various levels of opacity in between.


In Corel Paint Shop Pro select the Flood Fill Tool (the bucket) and from the Materials choose the Gradient option. Click on the Gradient image to define its properties. Choose Linear, from the pull down options the black to white gradient, and angle it at 0 degrees. Click on your layout to Flood fill your Gradient Mask.


If your mask is too big to be effective – you can select the mask and move it or resize it. I chose to squash mine down, until I liked the effect of the water fading into the paper. I added my title and dropped that behind the gradient mask to fade it into the background with the photo.

In Photoshop, choose Gradient (hidden under the Paint Bucket tool) and from the gradient menu options select a linear gradient that goes from black to white, or black to transparent. On your layout, click on the mask to ensure it is selected, then click and drag the mouse in the direction of the fade.

Note: Hold down the Shift key while dragging the mouse to get a straight gradient.


Ensure that the gradient starts and ends in a place where the edge of the photograph is not visible through the gradient. It may take a couple of attempts to get the mask the way you envisaged it. If the edge of the photo is visible, you are taking you gradient too far, keep the end point within the edges of the photograph.


Both layouts were framed with edge overlays while added elements move the layout away from a pure graphic design to a fun, mixed styled layout. Next time you want something fast and fabulous… FADE!!!

Sunday, August 30, 2009

Heritage Blocks


If you don't have an account yet, set yourself up at http://www.makeyourmomentslast.com/ then call me or send me an email & I will send you the template absolutely free so you can start creating your heritage blocks today!


heritage blocks instructions:


HERITAGE MAKERS:
The first 12x12 sheet makes 2 of the tall blocks 3.5x5.5”. The wedding announcement and the letter are just ideas... you can put photos, journaling, whatever you want. There is a piece for every side except the bottom.
The second 12x12 sheet makes 3 of the smaller square blocks 3.5”x3.5”. I added some text ideas, but you can remove them and do something different or add more photos.
Note: The patterns can also be switched out for an entirely NEW look... baby blocks, holiday, etc.

GETTING THE WOODEN BLOCKS:
The wooden blocks were made from a standard 2x4 from a home improvement store. They are very cheap, but make a lot, so you might want to do more than one set or share with someone. (2x4s are actually 1.5”x3.5” finished size.) The 2x4s can be cut with a hand saw, but we recommend using a power saw to save time, energy and to get a cleaner cut. Cut your wood into 3.5” square and 3.5”x5.5” rectangle blocks.

PREPARING THE BLOCKS:
You can sand the blocks a bit to get a smoother surface and edges. Then use some black or dark brown paint on the edges to keep any wood from showing through on your finished blocks. Also paint the bottom of each block.


PRINTING & ASSEMBLY:
Cut the pieces out of the 12x12” sheets. There will be dark brown edges on every piece. Compare with your wooden blocks and trim as needed. Once you have the pieces the right size you can use a dark marker to conceal the white edges of the photo paper. Using Matte Modge Podge, adhere your pieces to the block. Use a credit card to smooth out any bubbles. Allow to dry. Now add a layer of modge podge to the entire block to give it a finished look and texture.

Sunday, August 16, 2009

Photo Shop Shortcut tip from Designer Digitals

O - O - O - It's Magic!

You can also watch this tip on video on our blog: Digital Scrapbooking Tips and Tricks: Viewing Documents at Actual Size [Video]

The functions of Photoshop and Photoshop Elements are so amazing, it's almost like magic!
Here's a magical way to quickly re-size your document. When you want to view your document in the editing window as large as possible, press Ctrl + 0 (Mac: Cmd + 0) on the keyboard. This fills the editing window with your open document. I find this a fast way to return to workable size when I've zoomed way in or way out to work on the project.

When you want to view your document at actual size, press Ctrl + Alt + 0 (Mac: Cmd + Opt + 0) on the keyboard. This is especially helpful when you are resizing your project for viewing on the web or in online galleries.

Add these shortcuts to your bag of Photoshop tricks this week!

Saturday, August 8, 2009

(Vacation) Holiday Photo Tips

(Vacation) Holiday Photo Tips - (borrowed from Fotofast in Australia)

Prepare before you go and while you are away to make sensational photo books on your return, saving time and making a much more interesting photo book.


Part of the fun of any holiday is browsing through your photos. It's a great way of prolonging the feel good factor, especially when your photos reflect what a brilliant time you had. So here are a few helpful hints.


Get up to date
Be honest, how old is your camera? Digital cameras have come on leaps and bounds in the last few years. If yours is a little ancient it could be what's holding you back. Today's models have superb picture quality and easy to use features to give your images the edge. You could even cash in at the airport if going overseas by claiming the GST on any camera bought within a month of departure.


Camera Settings
Make sure that the file size is set to approx 1.5- 2mb per image or second highest quality and set your time and date. Make sure that you synchronize your cameras time/date with anyone else in your family or group, so when loading a photo book into our photo kiosks they will be in order, this saves a lot of time!


Plenty of pictures
Any photographer will tell you, to get great results it helps to take lots of pictures. Packing a spare camera battery and your charger will ensure you've plenty of power. With memory cards it's a case of the more the better. These are now great value so there's no excuse for not having enough.


Get inspired
Take a look at local postcards to give you an idea of where you can find the most interesting photo opportunities and note how professionals have captured local highlights. You don't have to copy what they've done but it will certainly inspire you. The most important thing is to make sure that you or your family or friends are in as many photos as possible, this is what will make your photo book your own unique photobook. You can always buy postcards or printed books if it is just about the view, building, animals etc. Take one of those small travel tripods and with your camera self timer you too can be in the photo.


Tell a story
Think about detail shots. When you're out enjoying dinner, in addition to typical shots across the table, get a photo of the outside of the restaurant so you can recall its name. Try and remember to photograph the food - before you tuck in! Perhaps there's a great view, or some musicians playing that would make a memorable photograph. Collections of themed photos like this really sum up the atmosphere and are perfect for photobooks, collages and calendars.


Early start
Get up early on holiday! Don't worry, you don't have to do this everyday, but catching the flattering early morning light will be a great asset to your images. Starting early also means there are fewer people to cause distractions. If you have to work in harsh daylight try putting your subject in the shade, or using fill-in flash to disguise unflattering shadows.


Think before you click
Think about the overall balance of your pictures. You don't want to end up with endless images of the same stretch of beach. Try waiting for a bright blue sky, interesting cloud formation, or breathtaking sunset. Also consider other areas of interest to give a sense of scale, such as your kids in the foreground making sandcastles, or colourful boats along the shore.


Check these web sites for lots of great ideas,

HP http://www.hp.com/united-states/consumer/digital_photography/take_better_photos/index.html
National Geographic http://photography.nationalgeographic.com/photography

Friday, August 7, 2009

The Worth of a Card

THE WORTH OF A CARD

The world is filled with all kinds of cards: birthday cards, wedding cards, graduation cards, get well cards, announcement cards… And beyond the event categories are humorous cards, sentimental cards, musical cards… With so many cards, it’s easy to run to the nearest store, buy a cheap card, and mail it.

Sure, buying a card can be simple, but what does a store-bought card really say? What ever happened to personalized cards that show thought and excitement for specific life events?

Shirley Johnson is a real-estate agent who put her creative skills to good use by designing personalized cards for some clients. The 5x7 invitation, which included a picture of the clients and their new home, was a great way for her clients to announce their move. They loved the card so much, they took time out of their Christmas day to call and thank Shirley. Shirley says it made her Christmas too.

Personalized cards don’t only say so much more to the recipients, they mean a lot to the givers as well.

Thursday, July 30, 2009

Testimonials

Great Books Testimonial by Susan Cotteleer

I was so excited to open my package from Heritage Makers. I could hardly stand it. I felt like a kid on Christmas morning. When I did open my two books, and looked through them, I was amazed. They are absolutely gorgeous. They exceeded my expectations! They are stunning and look so professional, yet have a personal touch—mine! I love them. Oh, this has opened up a whole new world for me. My grown son looks at his every day.

Thursday, July 23, 2009

How To Photograph Lightning

“The reason lightning doesn’t strike twice in the same place is that the same place isn’t there the second time.”-Willie Tyler


Check out this tutorial by Peter Carey and learn how to get that perfect shot!


http://digital-photography-school.com/how-to-photograph-lightning

Friday, July 17, 2009

Personalized Note Cards

* Cards Make Great GIFTS too! Give a loved one a set of personalized note cards as a meaningful gift. http://www.MakeYourMomentsLast.com

Thursday, July 16, 2009

Magnet Board Project

* Use the 12x18 poster to make a CUSTOM (and cheap!) MAGNET BOARD!"...take a 12x18 poster and use adhesive spray and glue it to a magnet board (she finds the magnet board at IKEA for around $7) On the poster make a darling collage and you've got a super custom magnet board!" - submitted by Stephanie Kuhn

Saturday, July 4, 2009

Photographing Fireworks

Happy 4th!

Check out Kim Komando's tips for photographing fireworks. She has lots of fun tips to share so you might want to spend some time at her site! http://www.komando.com/toolbox.aspx?mode=print&id=758

Thursday, June 25, 2009

Monday, June 1, 2009

June 2009 Online Class Schedule

Online Class Schedule

Introduction to Studio Webinars
Learn the basics of Heritage Makers Studio program.

Monday, June 1, 2009: 5:00 p.m.–5:45 p.m. MDT
Wednesday, June 3, 2009: 5:00 p.m.–5:45 p.m. MDT
Monday, June 8, 2009: 5:00 p.m.–5:45 p.m. MDT
Wednesday, June 10, 2009: 5:00 p.m.–5:45 p.m. MDT
Monday, June 15, 2009: 5:00 p.m.–5:45 p.m. MDT
Wednesday, June 17, 2009: 5:00 p.m.–5:45 p.m. MDT

Intermediate Studio Webinars
Learn about extra features such as “My Projects” and “My Favorites.”

Tuesday, June 2, 2009: 5:00 p.m.–6:00 p.m. MDT
Thursday June 4, 2009: 5:00 p.m.–6:00 p.m. MDT
Tuesday, June 9, 2009: 5:00 p.m.–6:00 p.m. MDT
Thursday June 11, 2009: 5:00 p.m.–6:00 p.m. MDT

Studio 2.0 Master Classes
Learn from studio experts about new and great techniques for making beautiful pages.

Thursday, June 11, 2009: 7:00 p.m. MDT
Topic: Scraplifting Duo – Demonstrating four ways to scraplift
Studio Product Manager: Lynda Angelastro
Guest Presenter: Kelly Wolfer

Thursday, June 25, 2009: 7:00 p.m. MDT

Debut of Studio 3.0!
Topic: Heritage Makers presents a first look at Studio 3.0
Studio Product Manager: Lynda Angelastro

Sunday, May 31, 2009

7 Reasons to be a Storybooker with Heritage Makers!

Linda Kutchall and lives in a small town in Saskatchewan. She is also an owner of a scrapbook store and a mother of three daughters. She admits to being a scrapbook addict from the time her first child was born some 10 years ago. But I soon learned that as much as Linda loves scrapbooking, she calls “storybooking” the next generation of scrapbooking, with the onslaught of digital cameras, photo enhancements and a generation that is more likely to preserve history like never before!

Linda chose Heritage Makers because the unbelievable creative component we offer is what she was seeking. Linda got busy creating her own family storybooks, and the more she used the system the more she loved it. Now Linda shares the magic of “storybooking” with her large client base.

Here are some reasons why Linda is now a storybooking addict (in her own words):

1. No mess! I could, within minutes, cover an entire table with papers, embellishments, glue, pens, pictures, and still not have everything I need to complete the perfect page. I can now sit on my couch with my laptop, while my kids watch a movie, and create all I want.

2. No need to go back through the years of scrapbook pages to fill in the story gaps I left because I didn’t want to handwrite the story and the computer wasn’t handy. Journaling is just as fun as the rest of it now!

3. No more trips to the photo store to resize, recolor, or reprint pictures. I can do it all with the mouse. What took 3-5 pages of scrapbooking can now fit into 1 or 2 page layouts!

4. All-inclusive pricing. The cost of Premier account includes all the embellishments, alphabets, paper, etc. that I will ever need. No need to stock up on flowers, ribbon and the like. A lot less waste. And it’s cheaper in the long run!

5. I don’t get bored. I could get bored quite quickly with a computer program that doesn’t change, or that is one dimensional that you can’t learn anything new from. I love the tutorials in Heritage Makers and the opportunities to learn new techniques and features. It keeps me hooked!

6. I can fill gaps in my traditional scrapbook with digital pictures from Heritage Makers. I can drag and drop into a template those events that perhaps didn’t warrant a little extra time to scrap. I can do a page in 8 minutes with this and it looks fab!

7. It warms my heart to make a book for my mother of her grand-daughters. It warms my heart to know that my children will have a sense of history in a storybook that will last a lifetime.

Linda, you had me at #1: No mess!

I want to thank you for your inspiring words and for carrying on the storybooking movement in your corner of the world. You are making a difference one storybook at a time!

Saturday, May 30, 2009

Young Authors Contest

Young Authors Contest

Has your child been telling stories lately? Enter your child in the Young Author’s Contest and help them create a book. Your child has so many stories that can be shared only through their eyes. Now it’s time for them to get creative and turn their stories into print.

Entries Welcome June 2 – August 31, 2009. June 1 go to the Contests page for more details. http://www.MakeYourMomentsLast.com

Once you've placed your entry, share your project previews with the rest of us! We'd love to see your kids' creations!

Wednesday, May 13, 2009

Write your own Poetry!

This is a fun site that helps you write your own poetry! Check it out ... http://ettcweb.lr.k12.nj.us/forms/newpoem.htm

Sunday, April 26, 2009

How to use Templates in Heritage Makers

There are tons of easy to use templates in your Heritage Makers account. This short Video will show you how to use them. Don't have an account yet? Sign up for free at http://www.MakeYourMomentsLast.com


How to Upload Photos to your Heritage Makers account

New to Heritage Makers or need a refresher? View this short video tutorial on uploading your photos:


Thursday, April 23, 2009

Worldwide Pinhole Photography Day!

Did you know it even existed? I didn't! Here's the 411

http://www.pinholeday.org/org/

Let me know if you participate! I would love to see your pictures!

Monday, April 20, 2009

Check this out ... take a photo of where you are on Earth Day (22nd) and upload it to this site. They're creating a mosaic of the earth out of everyone's photos!

Wednesday, April 15, 2009

Craft Tutorial: Photo Lanterns


Try this super easy photo lantern project & wow your friends & family. It's from Martha Stewart's "Decor8" web site.

Thursday, April 2, 2009

12 ways to use your camera as a tool... From PhotoJoto.com

Never leave the house without two things:
a Swiss Army knife, and your camera.

Why the knife? Because it’s a multitasking tool that you can use a kajillion different ways.

Why a camera? For exactly the same reason.

We’ve rounded up so many alternate uses for your camera that you’ll start bringing it everywhere. Use it as a flashlight, a memory aid, or a mirror, and you’ll never let it leave your side again.

Your camera may be a toy, but there’s no reason it can’t also be a tool.

12 Ways to Use Your Camera as a Tool

1. Mark Your Parking Spot
Before you head out on a long trip, don’t bother rooting around for a pen to write down your parking space number. Take a photo of your parking spot so you can find it again when you come back.
2. Use It Instead of a Printer
If you need to take directions with you, but don’t have a printer, take a picture of the computer screen instead. You can zoom in quite a lot, and will be able to read the directions on the camera’s monitor.
Also works for confirmation numbers, email addresses and incriminating online photos of friends and acquaintances.


3. Remember Fiddly Details
You know the drill: you run out of something, you go to the store to replace it, and you realize you can’t remember which size or model number you need. Snap a photo before you throw the old one away and you’ll have it on you when you need it.


4. Mark Your Property
Take a photo of your name and address, and lock it on your memory card. That way, if you ever lose your camera, the person who finds it will know who it belongs to.


5. Shopping Lists
Before heading out to buy ingredients for a project or recipe, take a picture of the ingredient list. Zoom in on the camera’s screen to be able to see each item on the list.


6. Retrace Your Steps
Take pictures of each step when you take something apart, so you’ll know how to put it back together later on. That way you won’t end up with those four screws and one unidentified twiddly bit that always seem to be left over after “fixing” something.

7. Collect Evidence
Heaven forfend you get in a fender bender, but if you do, you’ll be glad you had a camera. Taking photos of the accident scene will help you remember details of what really happened, and it’ll make the insurance claim rigmarole a lot easier.


8. Use It As a Mirror
Check your teeth for spinach when you don’t have a mirror. Or see how you look in really really dark sunglasses.


9. Make a Wishlist
When you see a book at a friend’s place that you want to read, an album you want to get, or a gift you want to pick up for somebody, take a photo of it. That way you’ll have all the information you need when you finally get around to going shopping.

10. Use It As a Flashlight
If you get caught without a flashlight, use the flash or focusing light on your camera to help you see better.
Or, if you drop your keys behind the sofa, use the monitor on your camera to help you see into places you can’t quite reach.

11. Remember Places You Want to Go
If you’re like us, you have a list of places you want to go, or restaurants you want to try, but when you find yourself with a free evening you draw a blank on where to go.
Taking pictures of places when you see them will remind you that there are loads of new places to try, so you won’t end up at the same restaurant every Friday night.


12. Record Phone Numbers
Chances are it’s easier to find your camera in a bag full of stuff than it is to find a blank piece of paper and a pen that actually works.
Save yourself some time and snap a picture of that crucial phone number when you’re out apartment hunting, or when you see a flyer you don’t want to forget.

Tuesday, March 31, 2009

Family Tree that includes non blood but important relatives


Bonnie Moore (Illinois), a wonderful consultant on our team, recently shared this very special book and idea.


Here is Bonnie's story...)

"I worked on a genealogy page for my grand daughter this week that I would like to share with you. There are two step-grandparents in our family and one in particular, is more influential in the lives of the grand daughters than is the biological grand parent. I wanted him present on the chart for sure. This page might help anyone else who has step parents of any kind and want them represented.

On the chart attached, I have connected the blood relatives by stems and the step relatives by a single leaf attached nest to the one they married. My chart is symmetrical, but I think it would still work if it were not, by enlarging the tree behind.

I did this in the template book "My Dream Come True" changing it to "Our Dream Come True." It's in a 12x12 size. I will make a single page for framing, too."

To view or use the template "My Dream Come True", visit http://www.makeyourmomentslast.com/ .

Thanks Bonnie!

Thursday, March 26, 2009

Photography Tips - Recorded Webinar

Professional Photographer and Heritage Makers Consultant, Randi Brundt, teamed with Candace May, Co-founder and Gold Director of Heritage Makers, and presented a WONDERFUL webinar today!

Randi shared very helpful tips that will help anyone (even me!) turn their future photos into great shots! She also shared some very INSPIRING Storybooking ideas - as well as great ideas for other types of Heritage Makers projects too!

And...here is the GREAT NEWS...IT WAS RECORDED!

Take 45 minutes and watch this fantastic webinar

http://www.box.net/shared/static/si2qggtfk7.wmv

Thursday, March 19, 2009

Word Clouds

Wordle is a toy for generating “word clouds” from text that you provide. The clouds give greater prominence to words that appear more frequently in the source text. You can tweak your clouds with different fonts, layouts, and color schemes. The images you create with Wordle are yours to use however you like. You can print them out, or save them to the Wordle gallery to share with your friends.

http://www.wordle.net/

enjoy!

Palette Finder

Jeck out this cool tool to find the color palette within your photos! Just upload a photo & click the "get palette" button. Very cool ... Makes it easy to create a good looking scrapbook page or project using the best colors to compliment your image.

http://www.cssdrive.com/imagepalette/index.php

Monday, March 16, 2009

Journaling - how to keep memories alive...and it isn’t that hard when you know how!

Written by Amanda, in the Pickleberrypop! e-newsletter

Recently I have been thinking more and more about the importance of journaling on my scrapbooking pages. Why did I start scrapping in the first place? To ensure that the story of our lives was passed on to future generations, so that they could know who we, their ancestors, are. Not long ago I was sitting with my Mother looking through some old photos of her Grandfather mowing his garden in Wolverhampton. Mum proceeded to tell me a wonderful story about her Grandfather’s retirement gift. When he was approached to find out what his perfect idea for a present would be all he wanted was one of those “new fangled” lawn mowers. Mum told me how very proud her Grandfather was of that mower and couldn’t wait to get home and give it a workout. It struck me that if I don’t make an effort to write down my Grandfather’s story it will be lost and my children will only see an old man pushing a mower around his yard. But I confess that recently I have fallen into the habit of making pages that are more for arts sake than to serve any story telling purpose. So I am going to make an effort in future to journal more on my pages and to remember that I am my family’s storyteller.

It is hard to get started journaling sometimes, and I often feel that the blank space on my page mocks me with it’s emptiness! I sometimes find myself stumped and unsure what to say, I suffer from journaling block. So I looked around to discover ways that could help me kick-start my journaling. The most helpful thing I discovered was to use the five W's when journaling:
WHO, WHAT, WHERE, WHEN and WHY

Who - Who are the people in the photographs, what are their names, and what are their relationships to you and your family. This will make it much easier for people looking at your pages in years to come.

What – What is happening in this photograph, what was the memorable occasion or special event that you are recording.

Where – Details about where the photograph was taken is always helpful when trying to work out background information to a story.

When – It is very important to make a note of the date, children especially like to know WHEN things happened and having an idea of the era that the photograph was taken certainly goes a long way to help explain bad fashion choices!

Why – Why did you take the photo? Why did you pick this particular photo to scrap, was there something special about it?

These are very helpful tools in getting your thoughts in order and ready for journaling. But there is one last thing to consider when journaling to tell the story of your life – HOW. How did you feel at the time, what were your thoughts and hopes and dreams at that special moment. It is the “how” that takes the journaling from the simple recitation of facts to a window into your life.
Now I know that that all looks like a big list of things to talk about and it may appear rather overwhelming at first but if you start by making short points at each of the W’s, and the How, then you are off to a great start. From short points it is much easier to make sentences that flow together in a natural sequence and before you know it you have journaled a lovely story about your photograph. Now it is not just a picture it is a memory, it is a story.

Another helpful journaling tool is to keep a notebook with you at all times to jot down thoughts as they occur to you. I really need to put one in my car because I am sure I have my best ideas while driving to work in the mornings! Some people say that finding quotes capturing the essence of the moment is a very helpful tool in getting the literary juices going as well.
There is a very big trend towards gorgeously lush, artistic pages that have little or no journaling on them. These are all stunning but they don’t tell us very much about the scrappers life, we don’t get to know them. I would like to challenge you (and myself) to see the beauty in journaling, to make a page that not only is lovely but also tells a story. All it takes is a few W’s, a how and a precious memory and you are on the right track to becoming your family’s very own storyteller.

Sunday, March 8, 2009

How to Photograph Spring Foliage Article and photos by Candice Stringham


Looking for more tips on how to photograph spring in all its glory? Your search has ended! Here’s how to capture all the beautiful foliage:


1. Equipment. Sometimes photo-worthy tree branches will be close by and sometimes they’ll be far away, so having a good zoom lens comes in handy. A zoom with macro is even better but not required.


2. Settings. One of the biggest challenges when taking pictures of spring flowers is the visual chaos. It’s difficult to take a good photograph when you’re dealing with numerous flowers and they’re all in focus. Why is this uncomfortable? There’s nowhere for the eye to focus. The next time you take a picture of tree branches, get in close, set your camera to aperture priority, and use an open aperture (a low number like 2.8) rather than trying to photograph the whole tree.


3. Backdrop. When photographing branches, watch what is in the background and try different angles. For the photo below, I shot from below on a sunny day and got the blue sky. In the example below, I photographed a picture when the sky was cloudy and got a white background.


4. Composition. You don't need to place everything in the center of your viewfinder and make everything symmetrical. In fact, sometimes having the scene asymmetrical and unbalanced is best. 5. Scene. While close-ups are great, it’s important to take 1-2 photos from far back to capture the overall feeling of spring in your area. So, choose a landmark in your city (or a spot you go to every year for a spring pick-me-up) and take a picture there. Armed with these five tips, you should be able to take a nice stroll through your city park and capture spring as well!


Photo by Candice Stringham

Friday, March 6, 2009

Jumpstart your journaling with these tips for babies

JOURNALING PROMPTS: SCRAPBOOKING BABY
It's time to catch up on all those adorable baby photos waiting to be scrapped! Need some prompts to get you started? Grab a pen and journal about one of these topics:

• The meaning or story behind baby's name
• Things baby has taught you
• Baby's favorites
• Top 10 things you love about your little one
• How your life changed after baby arrived
• Life described from baby's perspective

Oh, Baby! From the Editors of Memory Makers Books

Tuesday, March 3, 2009


As some of you may know, I'm in Las Vegas for the Photo Marketing Association this week. I've been taking lots of classes so I can do a better job at educating all of you when I return! I may even find a new gadget or two on the trade show floor ...
My plan was to update the blog daily at the very least, but am finding my full schedule isn't allowing me to do so! I'll check in when I can tho, so stay tuned!
Oh, and I have some interesting photos I've been taking for a collection called "a sign of the times". The photos are of logo-less monorails, buses and sign stands. An unusual sight in a city that plasters logos on anything they'll stick to! I'll be uploading those in the next few days.

Thursday, February 19, 2009

Frankie D.


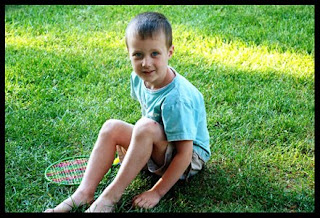
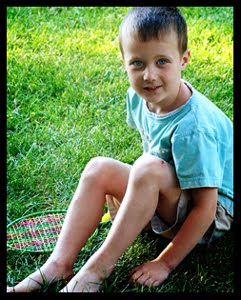
This is Frankie ... I'm sharing this photo for two reasons, firstly, I'm trying to get a free Jessica Sprague class! Secondly, I love my little wild one & want to share this playful photo with all of you!